BigMP4 Blog
How to Upscale a Video to 4K with AI (and What to Expect)
AI video upscaling can make a small MP4 easier to view on a large screen, but a larger frame is not the same as recovering the original scene. Start with the cleanest source and choose a scale that fits the real delivery size.
Keep your original video. AI processing can estimate detail and may introduce artifacts; review the output before relying on it.
Start with the delivery size, not the 4K label
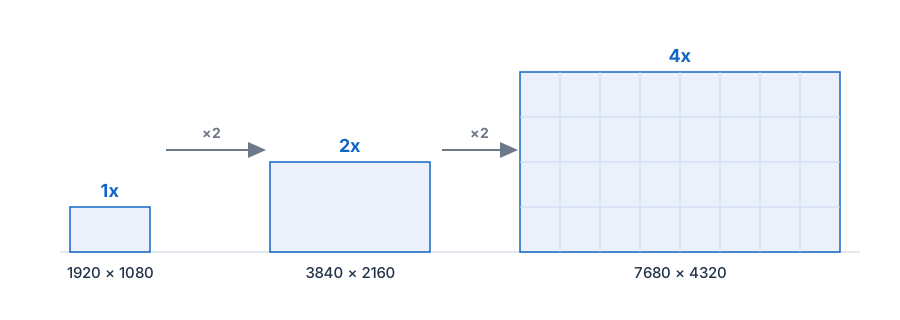
Write down the resolution you need before processing. BigMP4 offers 1x, 2x, and 4x enlargement; for example, doubling 1920×1080 produces 3840×2160 dimensions. Check the actual dimensions shown by the tool rather than assuming every source can become a standard 4K frame at a particular scale.
An enlarged file contains more output pixels, but fine texture, text, and fast motion may still be limited by the original. If the source is heavily compressed, out of focus, or already enlarged, no setting can reconstruct the exact details that were never recorded.
Prepare the best available MP4 source
Use the earliest-generation copy you can access. Repeated exports can add blockiness and ringing around edges, which become more visible after scaling. Keep a separate copy of the original so you can compare the processed result and return to the source if needed.
For a fair comparison, use a representative section with faces, fine edges, and motion rather than judging only a static title card. The site accepts MP4 and several other common video formats; its upload area lists the formats currently supported.
- Check the source dimensions Note the width and height, then multiply by 2 or 4 to estimate the output dimensions.
- Choose a realistic scale Use 2x when it reaches the target; reserve 4x for cases where the larger result is actually useful.
- Keep the original Save an untouched copy for side-by-side review.
Choose 2x or 4x without over-processing
In the task settings, select 2x or 4x under enlargement. A larger factor increases the output dimensions and processing work; it does not guarantee a sharper-looking result. Start with the smaller factor when it meets your delivery requirement, especially for noisy or highly compressed footage.
Noise reduction is a separate control. If the source has visible grain, try a low setting first and compare skin, foliage, and moving edges. Stronger denoising can remove texture as well as noise, so avoid stacking aggressive cleanup with enlargement unless the source calls for it.
Review the upscaled video at normal viewing size
After processing, inspect both a full-size frame and playback at the size where the video will be watched. Look for halos, softened lettering, flicker between frames, or details that look plausible but do not match the source. A still-frame improvement can be distracting in motion.
If the result looks artificial, reduce the scale or noise setting and run a short representative test again. Keep the version that looks most natural for the intended screen rather than the one with the largest pixel count.